1. Download Anyconnect windows package from here Cisco AnyConnect Client
2. Enable SSL VPN on UC540/560 via Cisco Configuration Assistant.
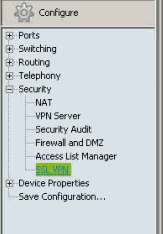
a. Log into CCA, go to Configure – Security – SSL VPN
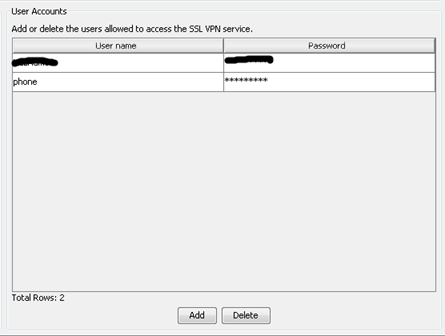
b. Under User Accounts – Click Add. Enter a new user (in this case we used user “phone” and password “ChangeMe2”).
c. Click “Advanced”. Select “Full Tunnel” mode and enter in a start and end IP range for remote clients.

d. Select “Install” under SSL VPN Client

e. Browse to the file downloaded in Step 1. Select download. (This may take some time to upload and install on the device).
f. Once it is installed, click OK to apply.
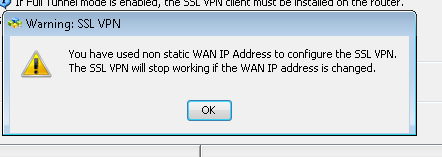
g. If device has a dynamically assigned IP address, you may receive the following error.
h. You can now close CCA, Saving the device configuration when prompted.
3. Log into Router via Telnet/SSH and enter global configuration mode.
4. Configure the UC as a Certificate Authority Server by entering the following commands.
a. Router(config)#crypto pki server uc_root
b. Router(config)#database level complete
c. Router(cs-server)#database url nvram:
d. Router(cs-server)#grant auto
e. Router(cs-server)#lifetime certificate 7305
f. Router(cs-server)#lifetime ca-certificate 7305
g. Router(cs-server)#exit
h. Router(config)#crypto pki trustpoint uc_root
j. Router(ca-trustpoint)# revocation-check none
k. Router(ca-trustpoint)# rsakeypair uc_root
l. Router(cs-server)#exit
m. Router(config)# crypto pki server uc_root
n. Router(cs-server)#no shutdown
o. Please enter a passphrase to protect the private key Password: ***** Re-enter password: ****
5. Create a second trust point on the UC, and authenticate it and enroll it with the CA by entering the following commands.
a. Router(config)#crypto pki trustpoint uc_cert
c. Router(ca-trustpoint)# revocation-check none
d. Router(ca-trustpoint)# exit
e. Router(config)# crypto pki authenticate uc_cert
f. Do you accept this certificate? [yes/no]: yes Trustpoint CA certificate accepted.
g. Router(config)# crypto pki enroll uc_cert Password:****** Re-enter password:******
h. Include the router serial number in the subject name? [yes/no]: no
i. Include an IP address in the subject name? [no]: no
j. Request certificate from CA? [yes/no]: yes
6. Enter telephone service configuration mode by entering the following command (telephony-service) then enter the command cnf-file perphone (this specifies that system generate a separate configuration XML file for each IP phone).
7. Configure VPN Group and Profile on Cisco UC by entering the following commands.
a. Router (config)# voice service voip
b. Router (conf-voi-serv)#vpn-group 1
c. Router(conf-vpn-group)#vpn-gateway 1 https://xxx.xxx.xxx.xxx/
d. Router(conf-vpn-group)#vpn-trustpoint 1 trustpoint uc_cert leaf
e. Router(conf-vpn-group)#vpn-hash-algorithm sha-1
f. Router(conf-vpn-group)#exit
g. Router (conf-voi-serv)#vpn-profile 1
h. Router(conf-vpn-profile)#authen-method both
i. Router(conf-vpn-profile)#auto-network-detect enable
j. Router(conf-vpn-profile)#host-id-check disable
k. Router(conf-vpn-profile)#exit
8. Ensure proper certificate is assigned to SSL VPN by entering the following commands.
a. Router (config)#webvpn context SDM_WEBVPN_CONTEXT_1
b. Router (config-webvpn-context)#ca trustpoint uc_cert
9. Associate a VPN Group and Profile to a SCCP IP Phone. (Note – If this is a new IP set to be connected remotely, you can provision it as per normal procedure and verify its operation first). Assuming the phone is a new set and has been already provisioned via standard procedures, you can assign the vpn-group and profile via the following commands.
a. Router(config)# ephone 1 ** dependent on the ephone tag of the phone.
b. Router (config-ephone)#vpn-group 1
c. Router (config-ephone)#vpn-profile 1
d. Router(config)# telephony-service
e. Router(config-telephony)# create cnf-files
f. Router(Config-telepony)exit
g. Router(config)# ephone 1 ** dependent on the ephone tag of the phone.
h. Router(config-ephone)# reset
Note that the command “create cnf-files” and a reset of the phone is required for vpn connectivity to establish.
10. Set Alternate TFTP Server on the IP Set. From the phone, go to:
a. Settings->Network Configuration->IPv4 Configuration->Alternate TFTP (Press **# to unlock) Select YES
b. If the phone is already registered, "TFTP Server 1" will already be populated. Otherwise, enter the CUCME address as the alternate TFTP Server 1.
c. Save the phone configuration.
11. The phone is now ready to be taken to the remote location. When powered up, it should automatically prompt for VPN username and password (as indicated below). Enter the username and password created in step 2b.
a. 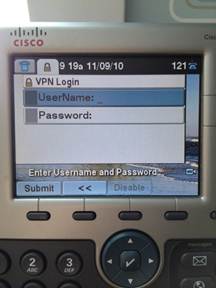

b. In the event it doesn't automatically prompt, navigate to Settings ->Security Settings ->VPN Configurations> Enable VPN and Enter Username and Password. The Phone will then register.